Main audit/assessment
This chapter describes the process how a (combined) main audit/assessment is created.
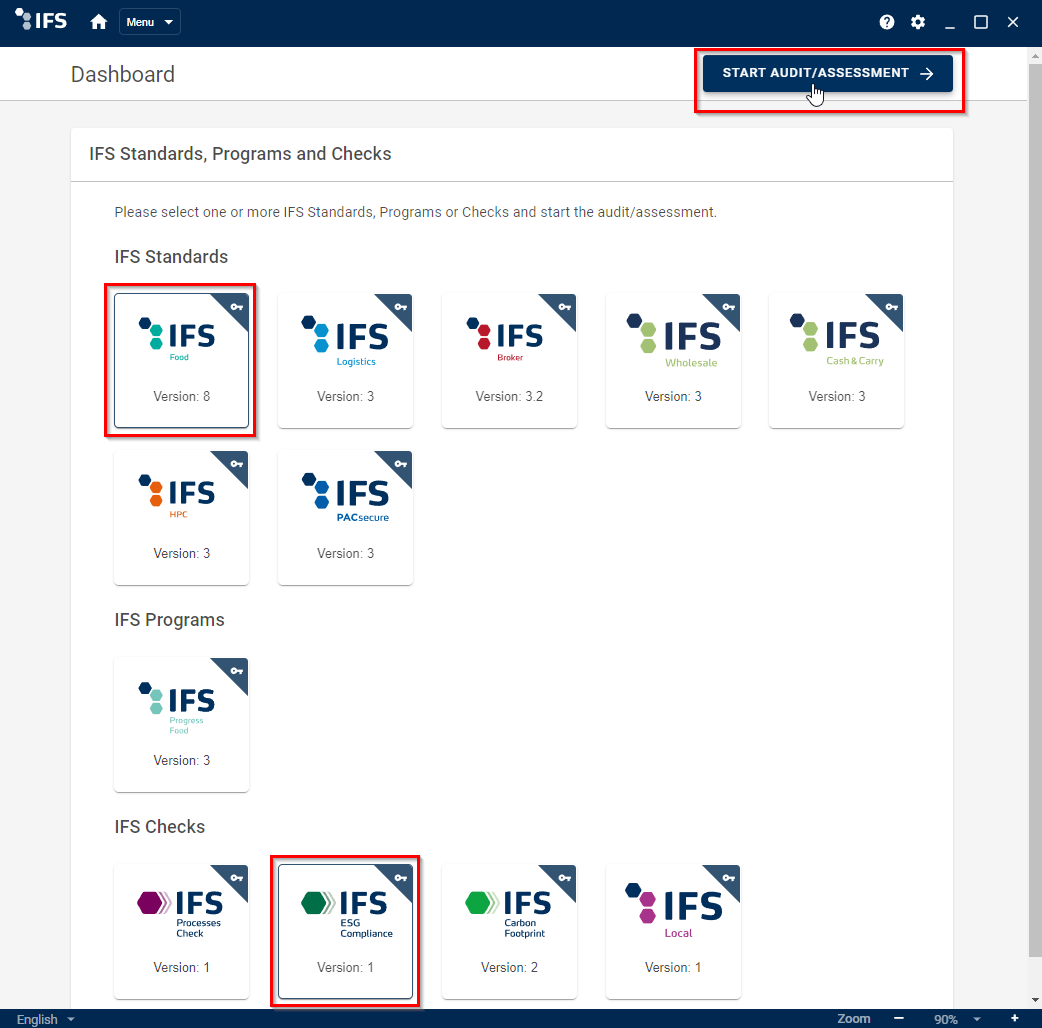
1. Dashboard
Select one or more IFS Standards, Programs or Checks from the dashboard and start the audit/assessment.
AXP Neo allows to combine several IFS Standards, Programs or Checks.
2. Start process
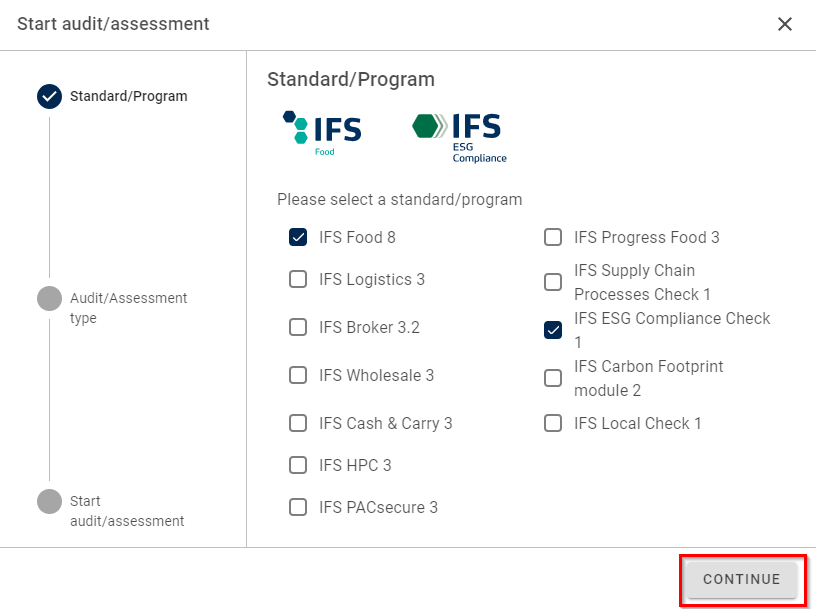
The start process prepares the (combined) audit/assessment file.
In the first step, the selected IFS Standards, Programs or Checks can be adjusted if needed.
Click CONTINUE to proceed with the audit/assessment configuration process.
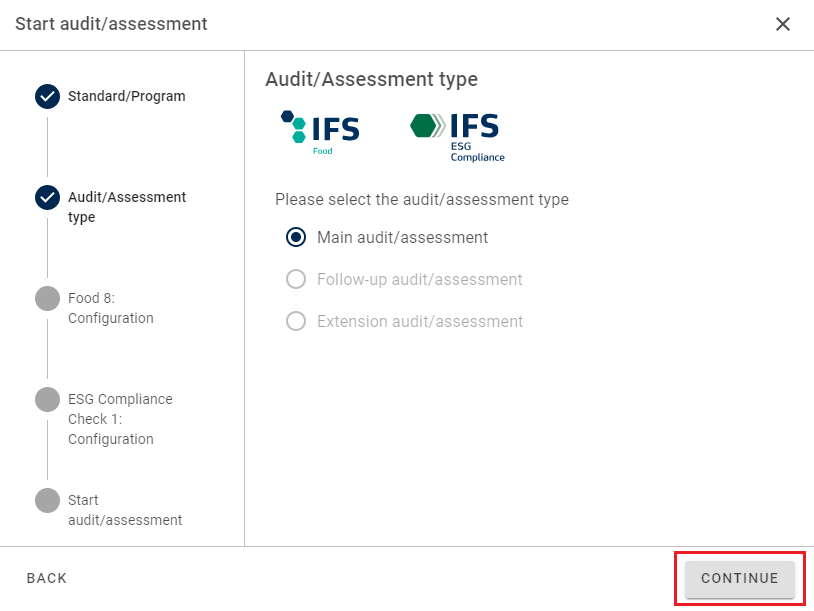
2.1 Select type
Select the type Main audit/assessment.
2.2 Configuration
The checklist configuration is depended on the chosen IFS Standard, Program or Check. Here you can choose its specifications.
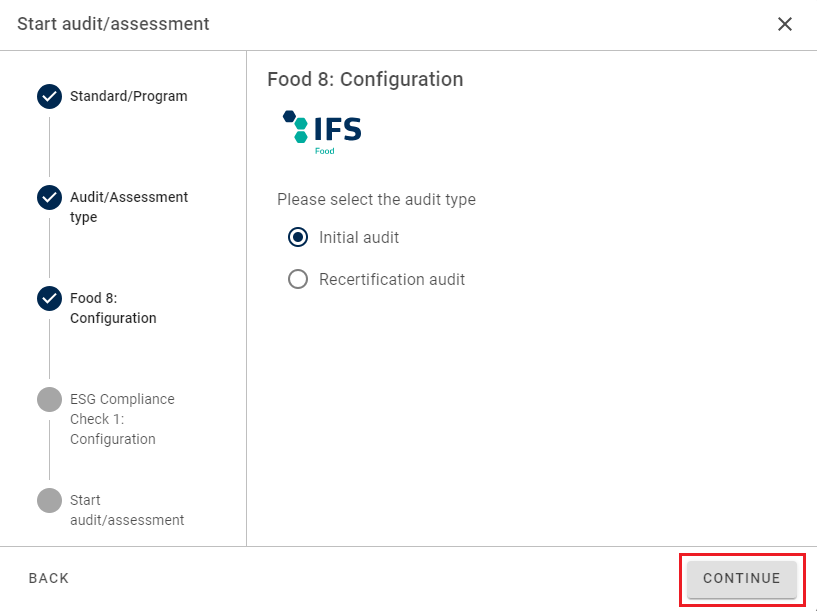
For more information, please see module related process
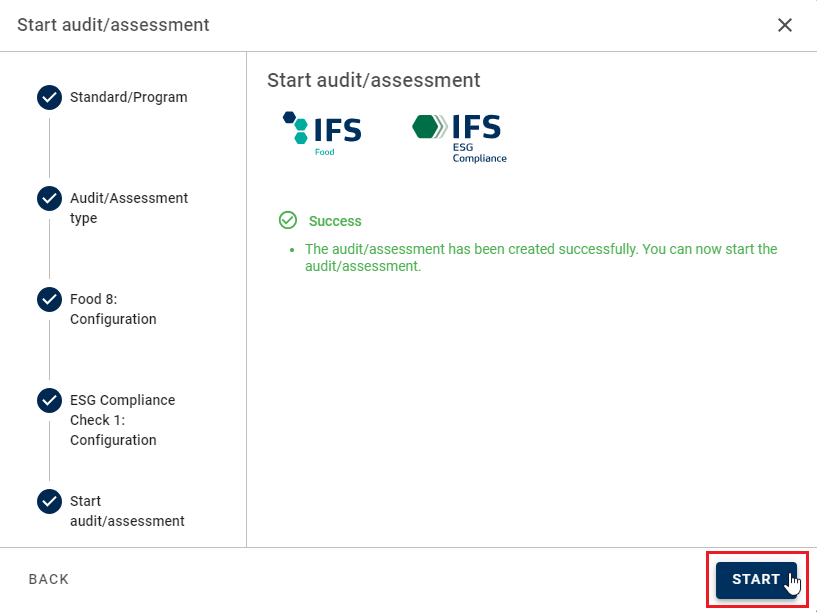
2.3 Start audit/assessment
The checklist configuration is now complete. The audit/assessment file is successfully prepared.
Click on START to begin with the audit/assessment.
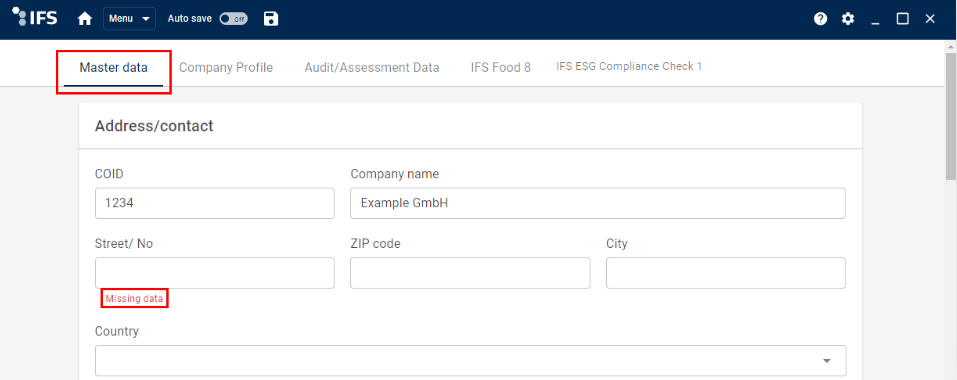
3. Master data
Fill in the master data. If information is missing for a required field, AXP Neo shows the hint Missing data.
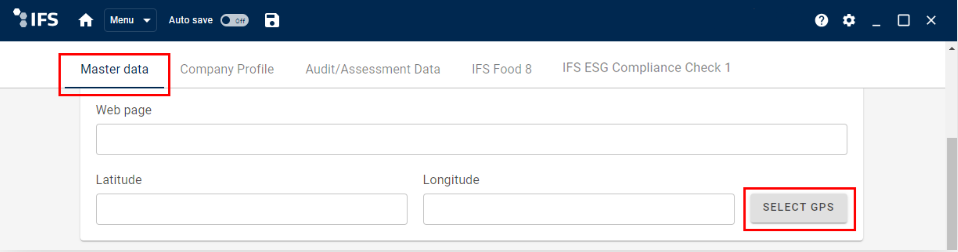
3.1 Select GPS coordinates
In the Master Data section you can click on SELECT GPS to fill in the longitude and latitude coordinates of the company. If fields have already been filled out, the GPS button takes this information and shows the specified location.
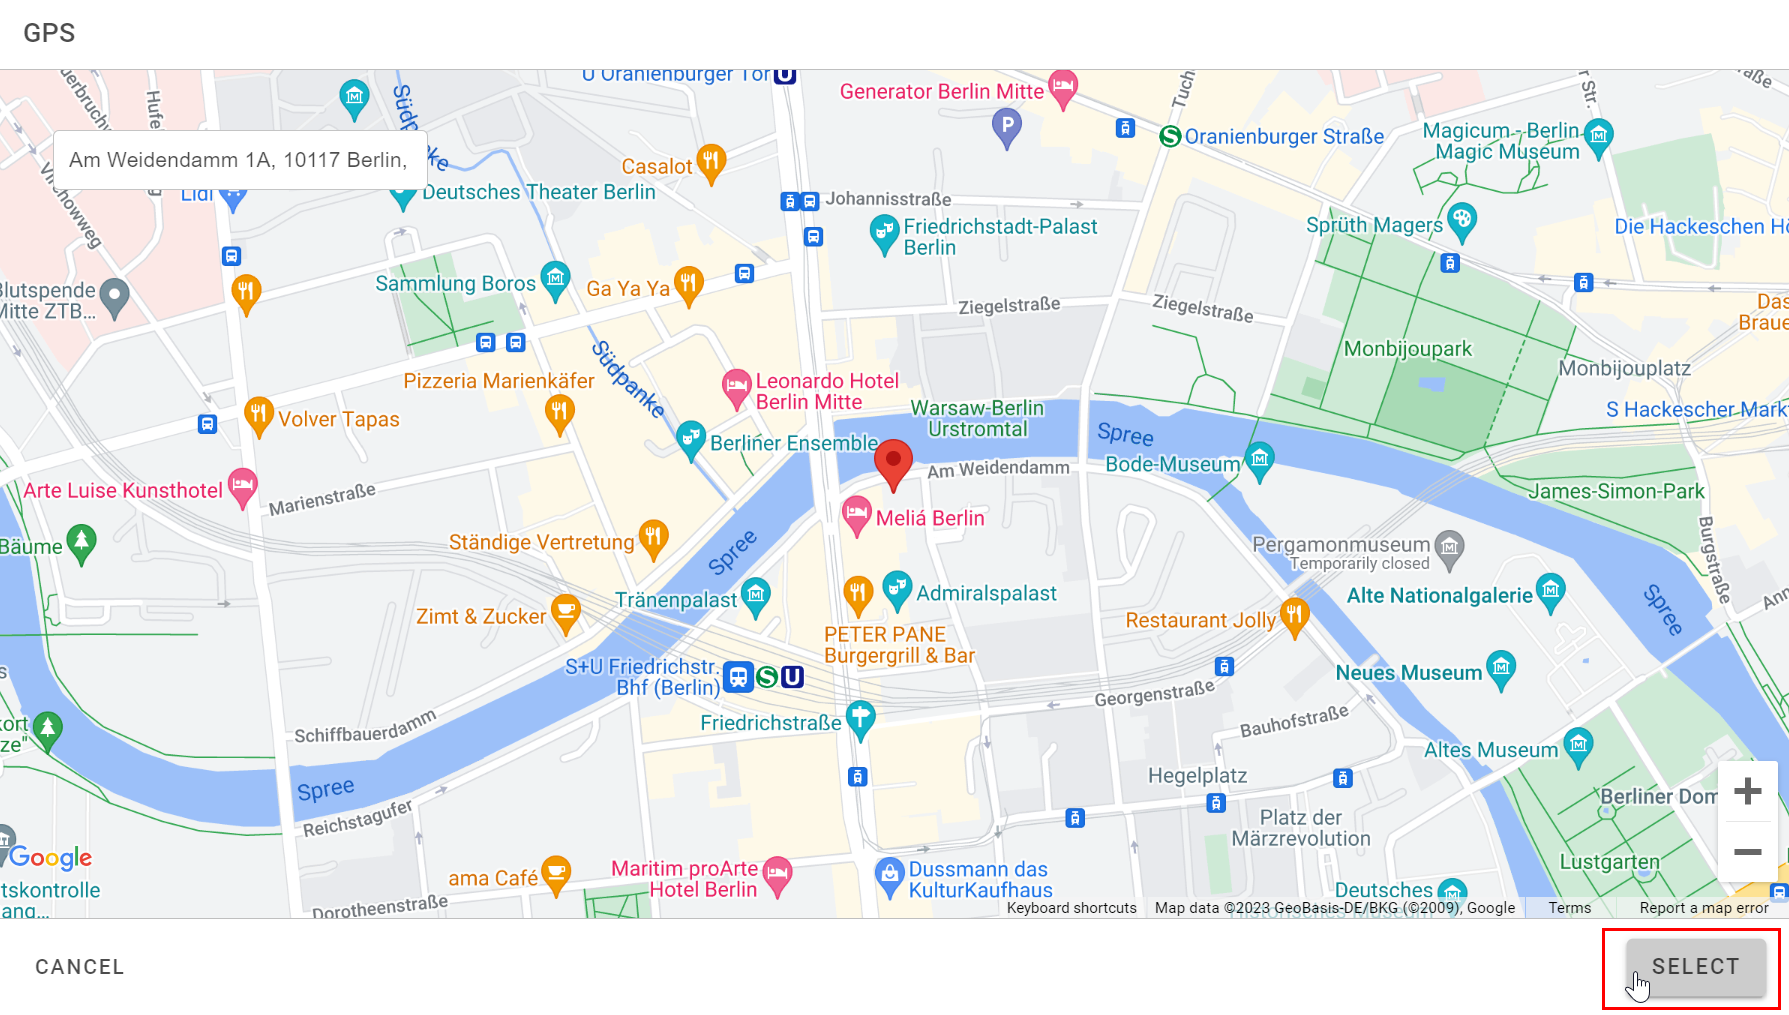
If you would like to correct the GPS coordinates, drag & drop the position indicator to the correct place on the map. Press SELECT to copy the new GPS coordinates into the master data.
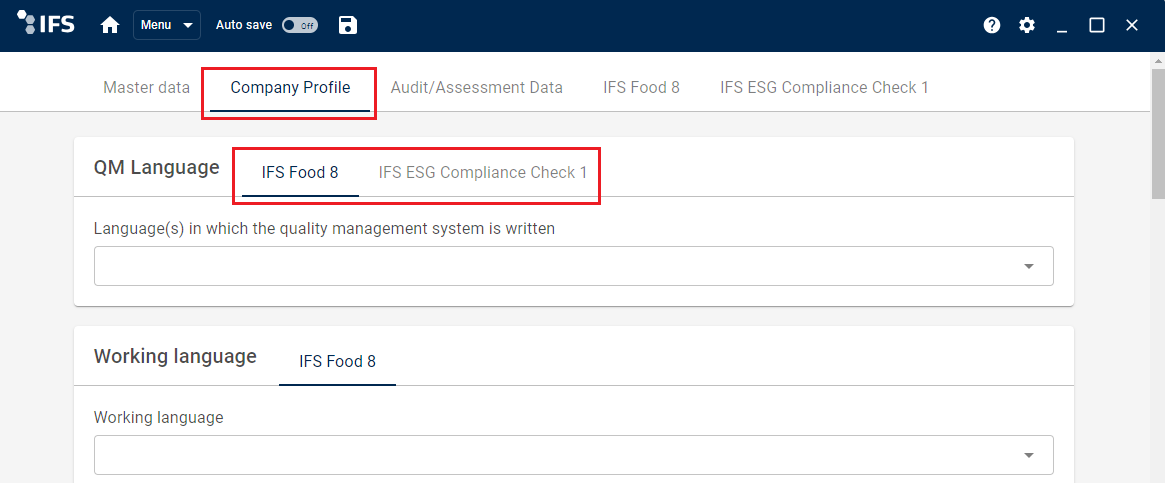
4. Company profile
Fill in the company profile data. If specific information in case of a combined audit/assessment is needed, AXP Neo displays different sub tabs.
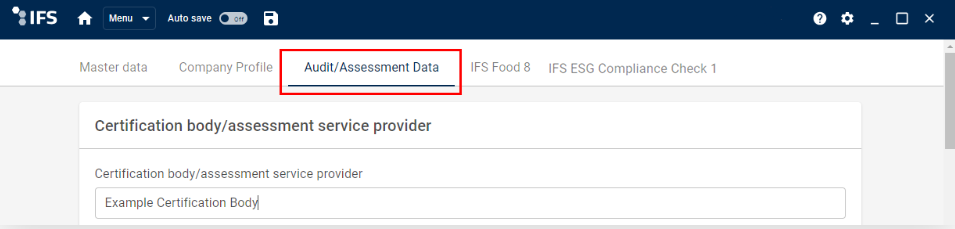
5. Audit/Assessment data
Fill in the audit/assessment data.
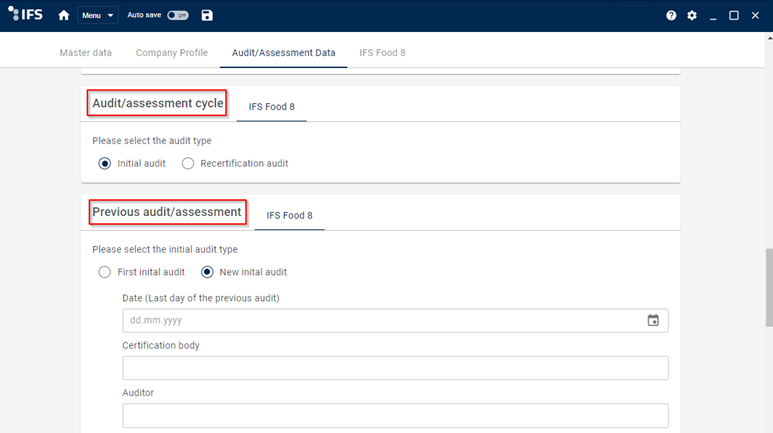
5.1 Audit/Assessment cycle
Select the audit/assessment type: recertification or initial audit.
Select whether it is a first initial audit/assessment or a new initial audit/assessment, and fill in the requested data.
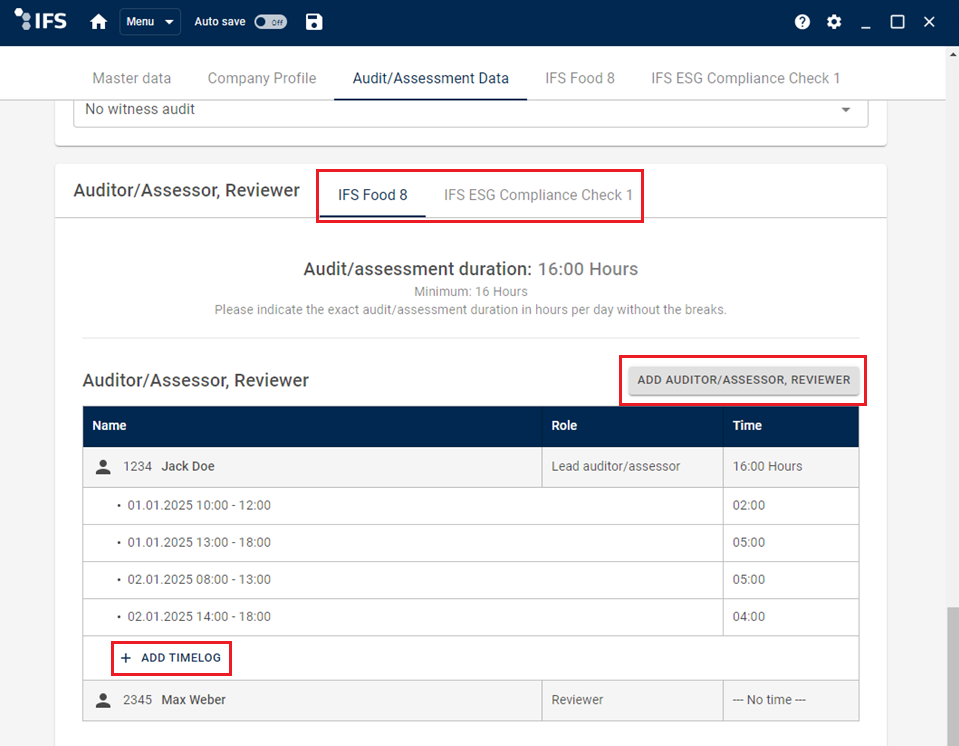
5.2 Auditors/Assessors, reviewer
In case of combined audits/assessments, the auditors/assessors and reviewer need to be entered in the specific module tab.
Add auditors/assessors and reviewer by clicking on ADD AUDITOR/ASSESSOR, REVIEWER.
- Fill in the details in the upcoming window.
- Insert the audit/ assessment dates and times (without lunch break) with a click on + ADD TIMELOG.
Modify auditor/assessor and reviewer details and/or audit/assessment times by a click on the entry.
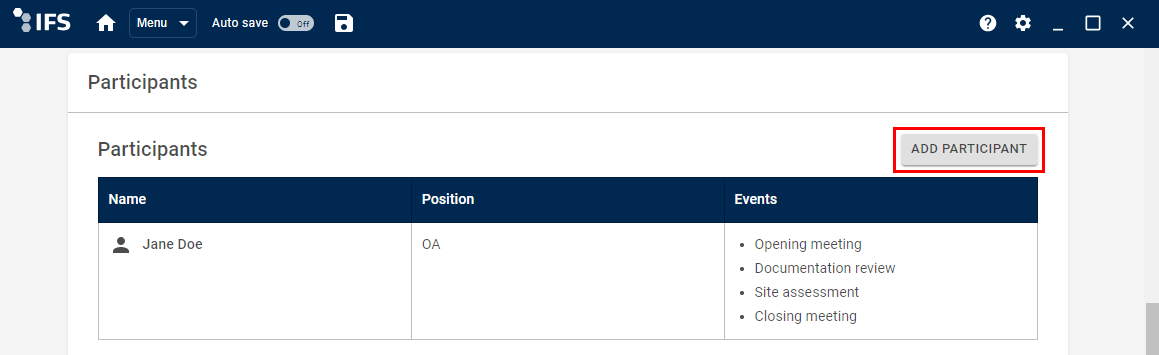
5.3 Participants
- Add participants by clicking on the button ADD PARTICIPANT.
- Fill in the upcoming window.
- Adjust the inserted data by clicking on the participant entry.
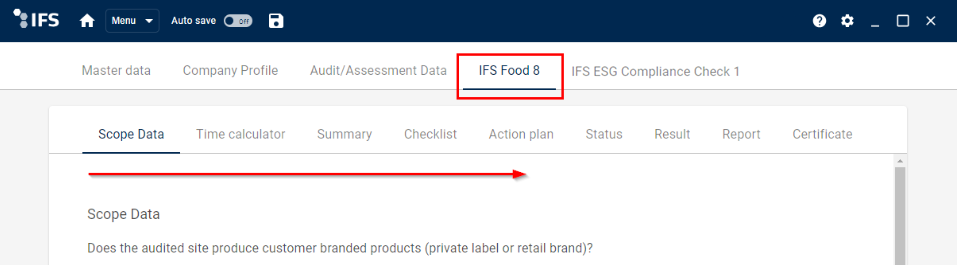
6. Audit/Assessment
A second menu bar comes up when entering the first selected IFS Standard, Program or Check.
Fill in the requested information tab by tab.
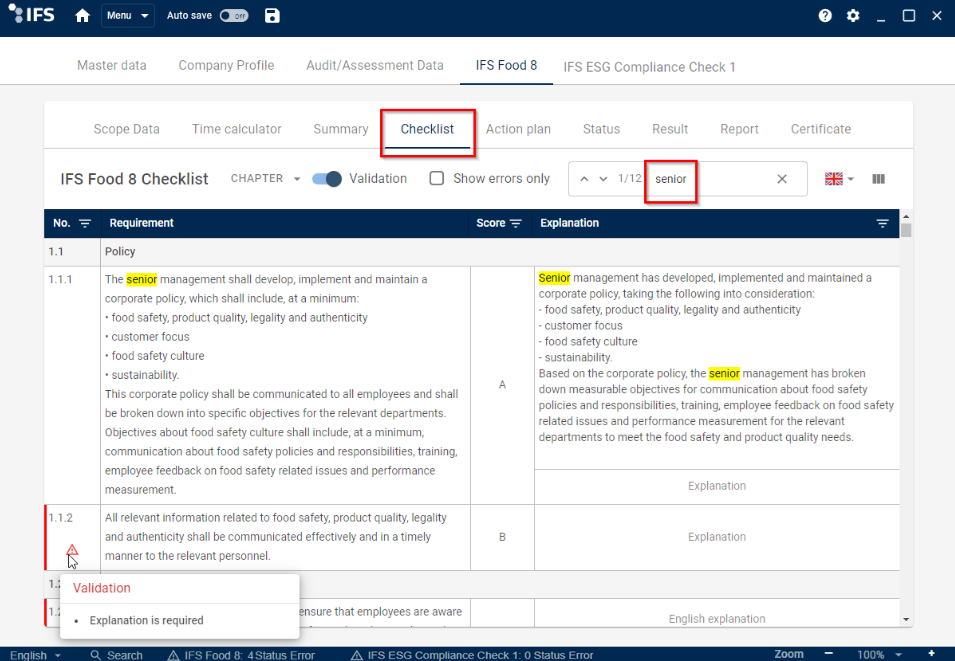
6.1 Checklist
Fill in the checklist with scores and explanations.
The language of the checklists can be changed with a click on the flag ![]() -icon.
-icon.
By clicking on the ![]() -icon you can make the note column visible or hide it.
-icon you can make the note column visible or hide it.
Further functions:
-
Use the chapter jump to navigate quickly in the checklist.

-
Switch the Validation toggle to check for errors.

-
Click the check box show only errors to filter the checklist.
-
Use the checklist search function to look up keywords in the checklist.

-
Use filter options

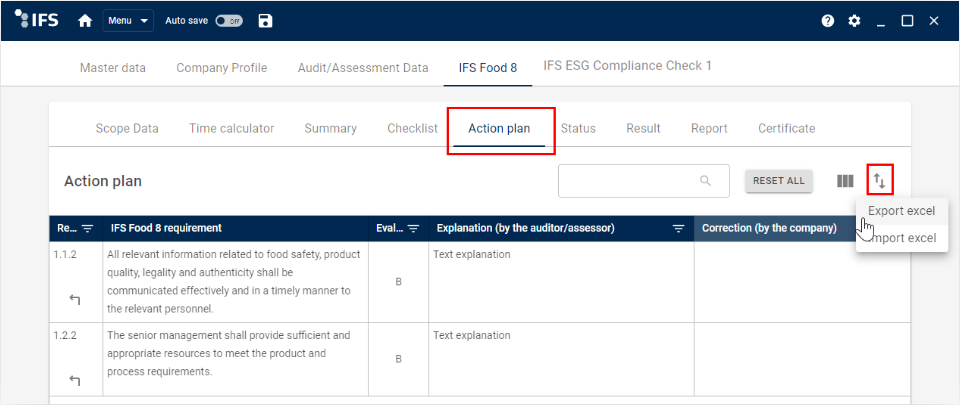
6.2 Action plan
Fill in the action plan.
Import/export the action plan with a click on the ![]() -icon.
-icon.
Further functions:
- Use the
 -icon to jump to a certain requirement in the checklist.
 - Use the global search function to look up keywords.
- Use the
 -icon to hide or show columns.
 - Use filter options.
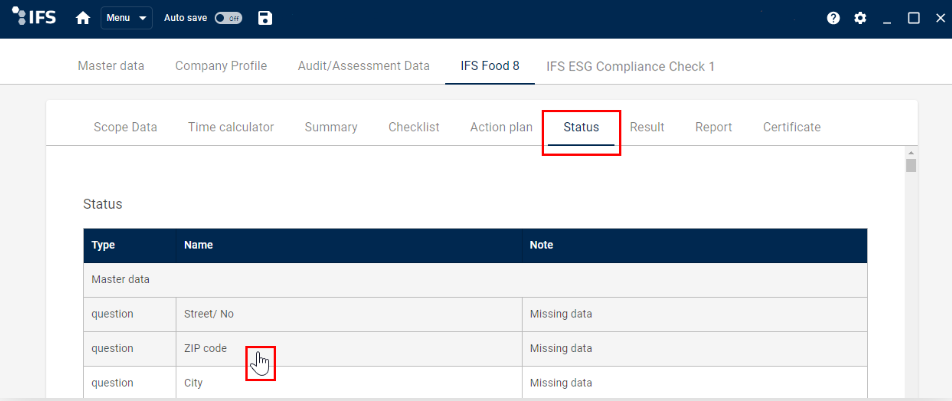
6.3 Status check
Check for missing data in the status tab. A click on a missing data entry will redirect you to the data field.
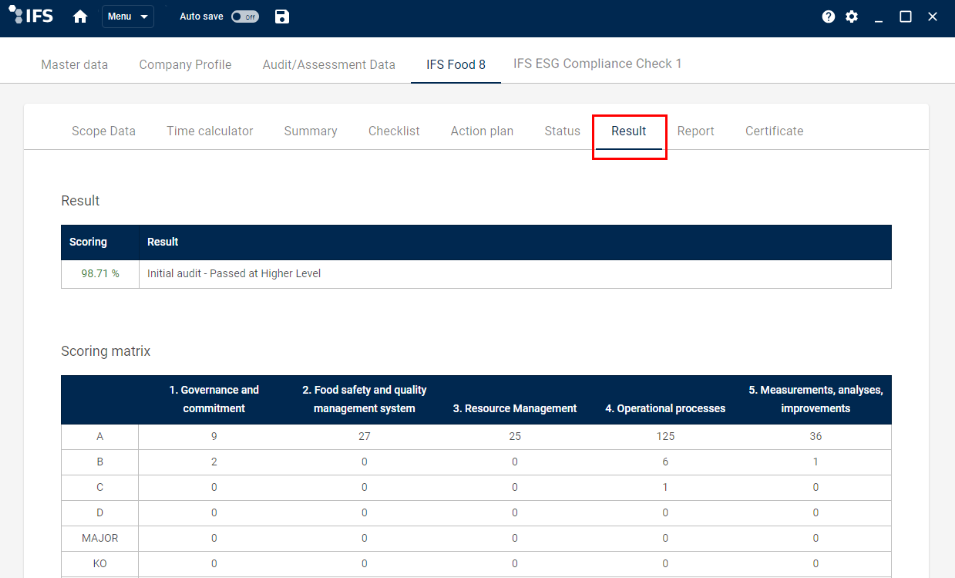
6.4 Result overview
The result is shown in the result tab.
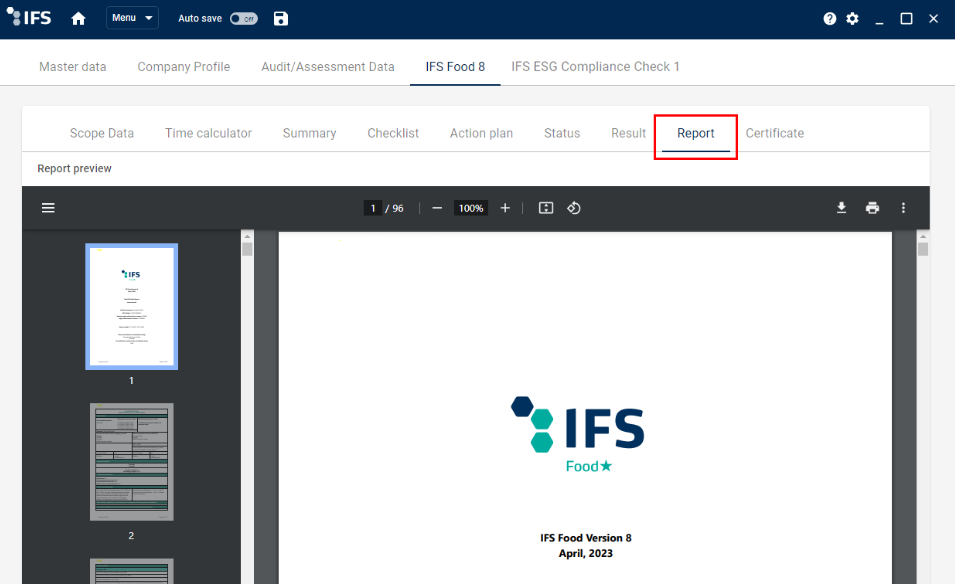
7. Report
If all data is entered and the status is checked, you can generate the report. Use the flag symbol to select the language in which the report should be generated.

If you have stored customised report cover page templates on your computer, a template drop-down menu is shown (see Usage of customised templates).
Download, print and other document options ![]()
8. Certificate/Letter of confirmation
This tab is active if a licence has been deposited. Generate the certificate/letter of confirmation by a click on the displayed button. Use the flag symbol to select the language in which the certificate should be generated.
If you have stored customised report cover page templates on your computer, a template drop-down menu is shown (see Usage of customised templates).
Download, print and other document options ![]()
